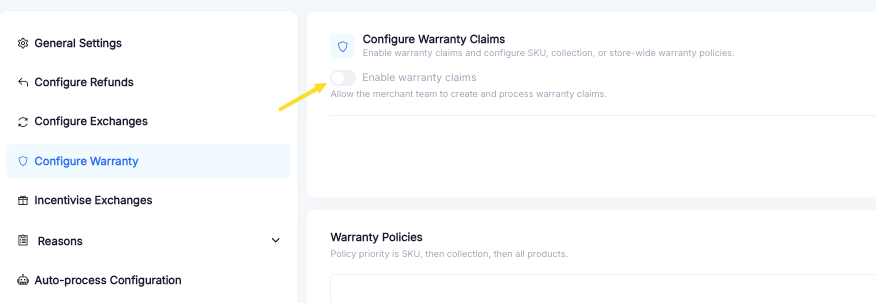
1. Enable this setting to activate Warranty. Setup is required.
If this setting is disabled, Warranty will not work even if the settings below have been configured.
2. Start configuring Warranty based on collections, SKUs, or all products.
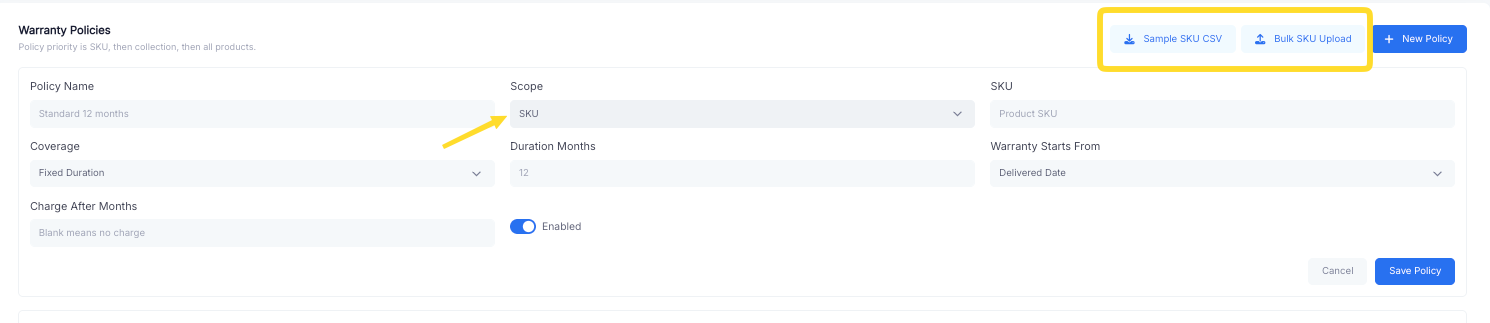
3.
a. Policy Name: Enter a name for the warranty policy based on your requirements.
b. Scope: Select whether the warranty applies to all products, specific SKUs, or specific collections.
c. Coverage: Select whether the warranty is valid for a fixed period or for the lifetime of the products included in the selected scope.
d. Duration in Months (for Fixed Coverage): Enter the number of months for which the warranty will remain valid.
e. Warranty Starts From: Select whether the warranty period begins from the order placement date or the delivery date.
f. Charge After Months: If you want to charge customers for warranty requests after a specific period - for example, six months after purchasing the product - enter the number of months here.
Note: For these charges to apply, configure the amount under Handling Charges and enable Apply Charges for the applicable warranty reasons.

b. a. Bulk SKU Upload: If SKU is selected under Scope and you need to add multiple SKUs to the policy, you can use the bulk upload option. Upload the SKUs before clicking Save Changes, and then save the policy.
Important: If multiple warranty policies apply to the same SKU, the system will prioritise the policy with the longer warranty duration.
For example, if SKU A has a 12-month warranty under an SKU-based policy and a 6-month warranty under a collection-based policy (which is set-up here), the system will apply the 12-month warranty.
4. Set Up Statuses: Configure the statuses your agents will use when processing warranty requests in the Warranty Portal. Once an agent takes action, the corresponding status will also be visible to the customer.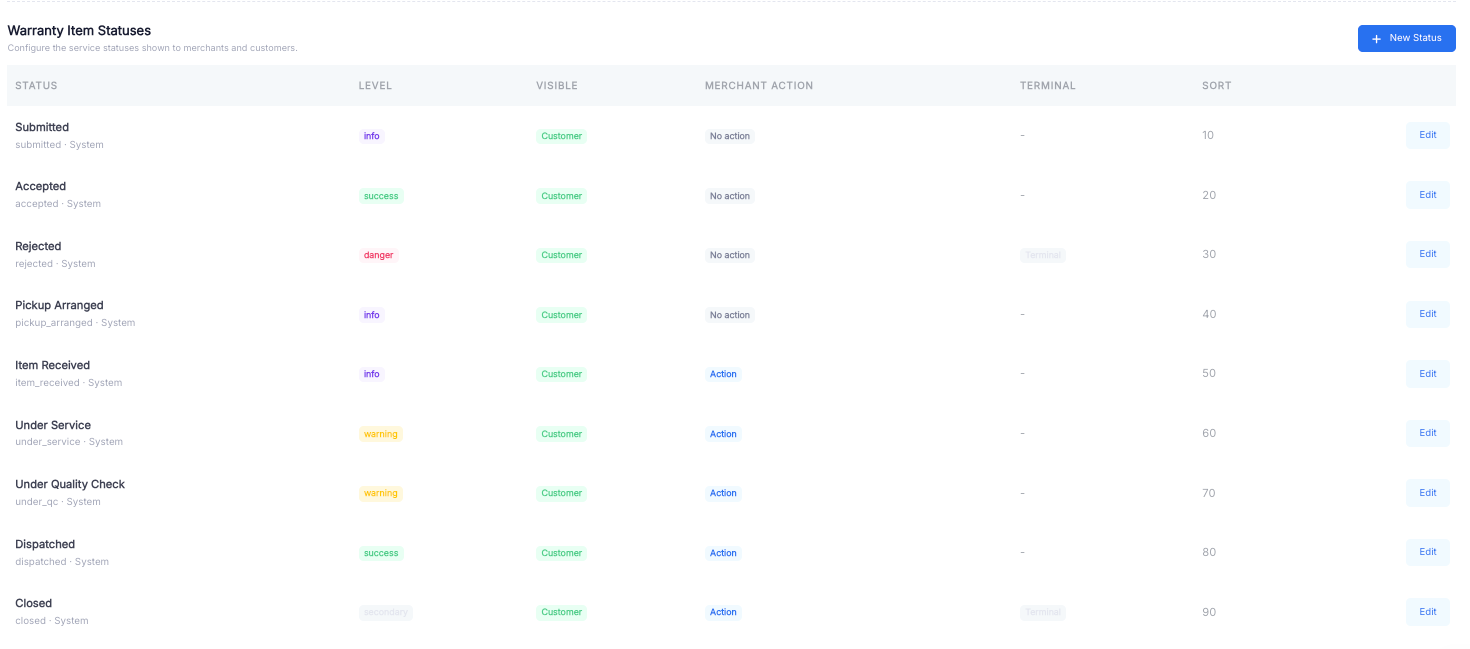
**
Returns/Exchange Link and Warranty Link: The Returns/Exchange link and the Warranty link are separate. The brand must add both links individually to the website footer.
If the brand does not want customers to raise warranty requests directly, remove the Warranty link from the website. Agents can still raise warranty requests internally through the Pragma Dashboard.
Warranty Reasons: Configure warranty reasons in the same way as return and exchange reasons.
Charges: If charges apply to warranty requests, configure the applicable amount under Handling Charges and enable Apply Charge for the relevant warranty reasons.
Was this article helpful?
That’s Great!
Thank you for your feedback
Sorry! We couldn't be helpful
Thank you for your feedback
Feedback sent
We appreciate your effort and will try to fix the article